Riced Cauliflower and Chayote Squash Fry

Riced Cauliflower and Chayote Squash Fry

Cauliflower
Side Dish
Stovetop
Keto Friendly
Low Carb
Quick Prep
Prep Time:
10 minutes
Cook Time:
12 minutes
Serves:
4
Protein per serving:
4g

A light, flavorful vegetable dish that combines the nutty taste of riced cauliflower with tender chayote squash. This simple stir-fry makes an excellent low-carb side dish or rice substitute, seasoned with aromatic spices and cooked to perfect fluffy texture.

Main Ingredients

  • 3 cups riced cauliflower (fresh or frozen)
  • 2 medium chayote squash (chow chow), peeled and cubed
  • 2-3 green chilies, finely chopped
  • 1 tbsp avocado oil or olive oil
  • Pink Himalayan salt to taste

Spices

  • 1 tsp cumin seeds
  • 1/2 tsp turmeric powder
  • 1/2 tsp crushed red pepper
  • 1/2 tsp freshly ground black pepper

Preparation

  1. Peel chayote squash, remove the soft inner flesh, and cut into small uniform cubes
  2. If using fresh cauliflower, rice it using a food processor or box grater
  3. Finely chop green chilies
  4. Have all spices measured and ready

Cooking Method

  1. Heat oil in a large pan over medium heat
  2. Add cumin seeds and let them sizzle for 30 seconds
  3. Add chopped green chilies and fry for 1 minute
  4. Add riced cauliflower and cubed chayote squash
  5. Sprinkle turmeric powder and mix well
  6. Cover with lid and cook for 4-5 minutes
  7. Add crushed red pepper, black pepper, and salt
  8. Mix thoroughly and cover again for 2-3 minutes
  9. Check that vegetables are tender but not mushy
  10. Remove from heat when cauliflower is fluffy and chayote is soft

Ragda Sabji (Split Yellow Pea Curry)

Ragda Sabji (Spiced Yellow Pea Curry)

North Indian
Yellow Peas
Main Course
Stovetop
Instant Pot
High Protein
Medium Prep
Prep Time:
20 minutes
(plus overnight soaking)
Cook Time:
45 minutes
Serves:
6-7
Protein per serving:
12g

Ragda Sabji is a hearty and flavorful spiced yellow pea curry that’s both comforting and nutritious. This protein-rich dish combines tender yellow peas with aromatic whole spices and a rich tomato-onion base. Popular as street food when served with bread or potato patties, it’s equally satisfying as a wholesome home-cooked meal.

Main Ingredients

  • 2 cups yellow peas (dried), soaked overnight
  • 3 large vine tomatoes
  • 1/2 large onion, finely chopped
  • 1 medium onion, chopped into large pieces
  • 4-5 garlic cloves
  • 1-inch piece fresh ginger
  • 2 green chilies, slit lengthwise
  • Fresh cilantro for garnish
  • Fresh lemon juice
  • Salt to taste

Whole Spices

  • 1 tsp aniseed (fennel seeds)
  • 2 tsp cumin seeds
  • 3 green cardamom pods
  • 2 whole cloves
  • 3 dried red chilies
  • 1/2 tsp turmeric powder

Cooking Oils

  • 2 tsp olive oil (or any cooking oil)
  • 1 tsp ghee (optional, for Vegan version)

Prepare the Yellow Peas

  1. Soak yellow peas in water overnight
  2. Drain and wash thoroughly
  3. Cook in Instant Pot with 4 cups water, salt, and 1/2 tsp turmeric powder
  4. Set aside 1/2 cup cooked peas separately for later use
  5. Reserve some cooking liquid for the gravy

Make the Spice Base

  1. Heat 1 tsp oil in a pan over medium heat
  2. Add cardamom, cloves, 1 tsp cumin, and aniseed – fry until fragrant
  3. Add dried red chilies and large onion pieces
  4. Fry for a few minutes until onions start to soften
  5. Add tomatoes and 1/2 tsp turmeric
  6. Cover and cook, stirring occasionally, until tomatoes soften completely

Create the Gravy Base

  1. Once tomatoes are soft, blend the cooked spice mixture with the reserved 1/2 cup peas
  2. Add some cooking liquid from the peas to make a smooth puree
  3. Strain if desired for a smoother texture

Final Assembly

  1. Heat 1 tsp ghee in the same pan
  2. Add finely chopped onions and green chilies
  3. Cook until onions are translucent
  4. Add the prepared puree and mix well
  5. Add cooked yellow peas with some cooking liquid
  6. Adjust consistency – it should be like a thick gravy
  7. Cover and simmer until desired thickness is reached
  8. Check seasoning and add salt as needed
  9. Turn off heat, wait 30 seconds, then add lemon juice to taste
  10. Garnish with fresh cilantro

Kosambari (Traditional Karnataka Tempered Salad)

Kosambari (Traditional Karnataka Tempered Salad)

South Indian
Lentils
Side Dish
No Cook
Raw Food
Plant Protein
Quick Prep
Prep Time:
15 minutes
(plus 30 min soaking)
Cook Time:
5 minutes
(tempering only)
Serves:
3-4
Protein per serving:
6g

Kosambari is a refreshing South Indian tempered salad from Karnataka, traditionally made with lentils and fresh vegetables. This nutritious dish combines split moong dal with crisp vegetables, aromatic curry leaves, and a classic mustard seed tempering. Unripe green mangoes also make a delicious addition, adding a tangy twist to this wholesome salad that’s perfect as a light meal or healthy side dish.

Main Ingredients

  • 1/2 cup moong dal, soaked in water for 30 minutes
  • OR 1/2 cup cooked green mung beans (soak overnight, cook in Instant Pot steamer for 2 minutes manual, natural release)
  • 2 medium carrots, finely diced
  • 1 cup baby radish, finely chopped
  • 1 medium cucumber, diced
  • 1 green chili, slit lengthwise
  • 1-2 tsp fresh grated coconut (optional)
  • Fresh lemon juice to taste
  • 1-2 tbsp fresh cilantro, chopped

For Tempering

  • 1/2 tsp coconut oil
  • 1 tsp mustard seeds
  • Few curry leaves (optional but traditional)
  • Pinch of hing/asafoetida (optional)

Optional Additions

  • 1/2 cup unripe green mango, finely chopped (adds wonderful tanginess)
  • 1/4 cup pomegranate seeds (for crunch and color)
  • Salt to taste

Prepare the Base

  1. If using raw moong dal: Soak in water for 30 minutes, then drain and rinse
  2. If using green mung beans: Soak overnight, cook in Instant Pot steamer for 2 minutes on manual, allow natural release
  3. Wash and finely dice all vegetables – carrots, radish, cucumber
  4. If using green mango, peel and chop finely
  5. Finely chop cilantro

Assemble the Salad

  1. In a large mixing bowl, combine the prepared moong dal and all diced vegetables
  2. Add green chili and fresh grated coconut (if using)
  3. Add chopped green mango if desired for extra tanginess
  4. Squeeze fresh lemon juice generously over the mixture
  5. Add chopped cilantro and gently toss everything together
  6. Add salt to taste and mix well

Prepare the Tempering

  1. Heat coconut oil in a small pan over medium heat
  2. Add mustard seeds and let them splutter
  3. Add curry leaves and hing if using (they will sizzle briefly)
  4. Immediately pour the hot tempering over the prepared salad
  5. Mix gently to distribute the tempering evenly
  6. Let it rest for 5 minutes to allow flavors to meld

Beetroot fry

Beetroot Fry (Traditional South Indian Vegetable Side)

South Indian
Root Vegetables
Side Dish
Stovetop
Instant Pot
Low Calorie
Quick Prep
Prep Time:
15 minutes
Cook Time:
20 minutes
Serves:
3-4
Protein per serving:
3g

A vibrant and nutritious South Indian side dish that transforms humble beetroot into a flavorful delight. This zero-waste recipe uses both beetroot and greens for maximum nutrition and color.

Main Ingredients

  • 4 medium beetroots, peeled and cut into small cubes
  • Beetroot greens (if available), washed, drained and finely chopped
  • 1/2 tsp coconut oil
  • 1 tsp salt (for steaming) + more to taste

For Grinding Paste

  • 1-2 small green chilies (deseed for less heat)
  • 1 tbsp fresh grated coconut
  • 2 tbsp fresh cilantro
  • 1 tsp cumin seeds

For Tempering

  • 1/2 tsp coconut oil
  • 1 tsp mustard seeds
  • 2 tsp whole urad dal
  • 1 red chili, broken
  • Pinch of hing (asafoetida)

Preparation Steps

  1. Wash, peel, and cube beetroots uniformly
  2. Separate, wash, and finely chop beetroot greens if available
  3. Grind green chilies, coconut, cilantro, and cumin to a coarse paste using minimal water
  4. Steam cubed beetroot with salt in Instant Pot for 0 minutes (brief pressure cook)

Final Cooking

  1. Heat coconut oil in skillet, add mustard seeds until they splutter
  2. Add urad dal, hing, and broken red chili
  3. When urad dal turns golden, add steamed beetroot
  4. Add ground spice paste and salt to taste
  5. Cover and cook 2-3 minutes on low heat
  6. Add chopped greens and cook uncovered for 2 minutes

Ginjalu Kootu (Traditional South Indian Legume and Vegetable Stew)

Ginjalu Kootu (Traditional South Indian Legume Stew)

South Indian
Legumes
Lunch/Dinner
Stovetop
Instant Pot
High Protein
Medium Prep
Prep Time:
30 minutes
(plus overnight soaking)
Cook Time:
45 minutes
Serves:
4-6
Protein per serving:
15g

A traditional South Indian legume and vegetable stew that combines protein-rich beans and lentils with aromatic spices in a tangy tamarind base. This hearty, nutritious dish is both comforting and satisfying.

Main Ingredients

  • 1 cup dried kabuli chana (chickpeas)
  • Handful of raw peanuts
  • 1/4 cup kala chana (optional)
  • 1 cup tuar dal (split pigeon peas)
  • 1 cup chopped vegetables (choose one: white pumpkin, brinjal, or bitter gourd – optional)

Spices & Seasonings

  • Lemon-sized tamarind
  • 1 tsp jaggery
  • 2 tsp mustard seeds
  • 1 tsp coconut oil (or skip for oil-free version)
  • 1/2 tsp turmeric powder
  • Salt to taste

For Spice Paste

  • 1 tsp whole black pepper
  • 3 tsp coriander seeds
  • 1.5 tsp chana dal
  • 1.5 tsp urad dal
  • 1/4 tsp methi seeds (fenugreek)
  • 1 red chili
  • 2 tbsp fresh grated coconut

Prepare the Beans (Night Before)

  1. Soak chickpeas, peanuts, and kala chana in water overnight
  2. Next day, drain and wash the soaked beans
  3. Cook in Instant Pot with double the water, 1 tsp salt, and 1/2 tsp turmeric for 10 minutes (manual mode, natural release)
  4. Drain the cooked beans and set aside

Prepare the Spice Paste

  1. In a dry skillet, roast red chili, black pepper, coriander seeds, chana dal, urad dal, and methi seeds until fragrant and lightly golden
  2. Cool completely and grind with fresh grated coconut to a fine paste (the natural coconut oil will help bind the paste)
  3. Add minimal water if needed for grinding

Final Assembly

  1. Cook tuar dal with 2 cups water, 1/2 tsp turmeric in Instant Pot for 10 minutes
  2. Soak tamarind in hot water for 15-30 minutes, then strain to get tamarind water
  3. In a large saucepan, cook tamarind water with turmeric and salt until raw smell disappears (5 minutes)
  4. Add cooked beans, peanuts, 3/4 cup cooked tuar dal, and ground spice paste
  5. Simmer for 5 minutes to integrate flavors
  6. Add prepared vegetables (if using) and cook for 5 more minutes
  7. Add jaggery and cook for 1 minute
  8. For traditional version: Heat coconut oil, add mustard seeds and urad dal, when golden, pour over the kootu

Dal Tadka (Traditional Yellow Lentil Curry)

Dal Tadka (Traditional Yellow Lentil Curry)

North Indian
Lentils
Lunch/Dinner
Stovetop
Instant Pot
High Protein
Low Prep
Prep Time: 10 minutes
Cook Time: 35 minutes
Serves: 4
Protein per serving: 13-14 g
My absolute comfort food! This protein-packed lentil curry became the foundation of my meal prep journey.

Ingredients

For the Dal

  • 1 cup yellow lentils (masoor dal), washed
  • 2 cups water
  • 1/2 teaspoon turmeric powder
  • Salt to taste

For Cooking Together

  • 1 medium onion, chopped into big pieces
  • 2 medium tomatoes, chopped
  • 4-6 green chilies, slit lengthwise
  • 1 tablespoon finely cut ginger

For the Tadka (Tempering)

  • 1 teaspoon ghee
  • 1 teaspoon cumin seeds
  • Pinch of asafoetida (optional)
  • Lemon juice
  • Fresh cilantro for garnish

Instructions

Cook the Dal (Instant Pot Method)

  1. Add lentils, onions, tomatoes, ginger, green chilies, water, turmeric, and salt to Instant Pot
  2. Cook on manual mode for 7 minutes
  3. Allow natural pressure release
  4. Lightly mash the dal and set aside

Prepare the Tadka

  1. Heat ghee in a small pan
  2. Add cumin seeds and let them splutter
  3. Add asafoetida if using
  4. Pour this tempering over the cooked dal

Final Touch

  1. Add fresh lemon juice and stir well
  2. Taste and adjust salt as needed
  3. Garnish generously with fresh cilantro

Recipe Notes

  • Lentil choice: Masoor dal cooks quickly and has a lovely texture
  • Consistency: Should be slightly thick but pourable
  • Variations: Substitute onions and tomatoes with bottle gourd or zucchini, or add vegetables like carrots and green beans for extra nutrition
  • Storage: Freezes beautifully for up to 3 months
  • Serving tip: Taste before serving – dal absorbs flavors as it sits

Nutritional Benefits

  • High protein from masoor dal supports muscle health
  • Quick cooking compared to other lentils
  • Rich in folate and iron
  • High fiber promotes digestive health
  • One-pot nutrition with vegetables cooked right in

Week 3 Recipes

Week 3 Recipes

Week 3 was all about building on the success of Week 2 while introducing some of my favorite comfort foods – rajma and south indian upma!

I also had some leftover sweet potato and channa salad from Week 2 that I incorporated into this week’s meal plan.

My daily breakdown goal remained:
– Breakfast: 300-350 calories, 15-20g protein
– Lunch: 400-450 calories, 25-30g protein
– Dinner: 350-400 calories, 20-25g protein
– Snacks: 300-350 calories, 20-25g protein


Main Dishes

Rajma Masala (Kidney Bean Curry) (5 servings)

Ingredients

  • 400g cooked rajma (from 150g dry kidney beans)
  • 150g onions, chopped
  • 1 small can tomato paste (No salt added)
  • 15ml oil and ghee together
  • ginger-garlic paste
  • 2 tsps cumin seeds
  • 1.5 tsp cumin powder, 2 tsp coriander powder, 2g turmeric, 2g red chili powder
  • 300ml water
  • Dried methi leaves (crushed and added at end)
  • Salt, fresh coriander

Instructions

  1. I followed Swasthi’s Rajma Recipe using my Instant Pot
  2. Heat oil and ghee, sauté onions until golden brown (this is crucial for flavor!)
  3. Add ginger-garlic paste, cook 1 minute
  4. Add tomato paste and spices, cook until oil separates
  5. Add cooked rajma and water, simmer 15-20 minutes
  6. Mash few beans for thickness
  7. Add crushed methi leaves and garnish with coriander
Prep tip: Soak rajma overnight, pressure cook until very soft before making curry
Pairs with: Brown rice, chapati, or quinoa

Protein per serving (250g): 18 grams

Mixed Vegetable Dal (4 servings)

This one-pot wonder became my go-to when I wanted something comforting and nutritious. I love how the vegetables cook right in the dal, making it so flavorful. Fair warning – I like my food spicy, so adjust the chilies to your taste!

Ingredients

  • 120g mixed dal (moong + toor)
  • 200g mixed vegetables (bottle gourd, beans, carrots) – cooked in dal
  • 80g onions, chopped
  • 6-7 green chilies (I prefer it spicy – reduce for less heat!)
  • 1 dried red chili
  • 2 tablespoons ginger, chopped
  • 15ml oil
  • 5g cumin seeds, 2g turmeric
  • 500ml water
  • Salt, coriander
  • Lemon juice (optional, at the end)

Instructions

  1. Pressure cook dal with turmeric and vegetables until soft
  2. Heat oil, add cumin seeds
  3. Add onions, cook until translucent
  4. Add ginger, green chilies, and dried red chili
  5. Add cooked dal-vegetable mixture, simmer 10 minutes
  6. Garnish with coriander and add lemon juice if desired
Spice level: Medium-hot (reduce chilies for milder version)
Pairs with: Rice, quinoa, or chapati

Protein per serving (300g): 14 grams

Broken Wheat Upma with Vegetables (4 servings)

A lighter, healthier version of traditional upma that’s still incredibly satisfying. The vegetables cook right in, making it a complete meal. Perfect for dinner when you want something filling but not heavy.

Ingredients

  • 100g broken wheat (dalia)
  • 250g mixed vegetables (beans, carrots, peas, bell peppers) – cooked in upma
  • 60g onions, chopped
  • 10g ginger, chopped
  • 2-3 green chilies
  • 12ml oil
  • 5g mustard seeds, 5g urad dal, curry leaves
  • 500ml hot water
  • Salt, lemon juice, coriander

Instructions

  1. I used my Instant Pot and followed this recipe from Cooking with Pree
  2. Snacks & Sides

    Sprouted Bean & Makhana Chaat (2 servings)

    This became my favorite afternoon snack! The combination of textures is amazing – soft sprouts, crunchy makhana, fresh vegetables. So satisfying and refreshing.

    Ingredients

    • 160g sprouted green moong
    • 40g roasted makhana, crushed
    • 60g cucumber, diced
    • 60g tomatoes, diced
    • 40g red onion, diced
    • 15ml lemon juice
    • 2g chaat masala, 1g black salt
    • Fresh mint and coriander
    • Optional: 50g Greek yogurt

    Instructions

    1. Steam sprouts lightly (optional for easier digestion)
    2. Mix all vegetables and sprouts
    3. Add crushed makhana for crunch
    4. Add lemon juice, spices, herbs
    5. Mix in yogurt if using
    6. Serve immediately
    Texture tip: Add makhana just before eating to keep it crunchy

    Protein per serving (200g without yogurt): 8 grams

    Protein per serving (250g with yogurt): 12 grams

Spiced Roasted Makhana (6 servings)

My healthy alternative to chips! These kept me satisfied between meals and added great crunch to salads.

Ingredients

  • 150g makhana
  • 5ml oil
  • 2g chaat masala, 1g black pepper, 1g turmeric
  • Pinch of black salt

Instructions

  1. Heat oil in pan
  2. Add makhana, roast until crispy (5-7 minutes)
  3. Sprinkle spices while hot
  4. Cool completely, store in airtight container
Storage: Keeps fresh for 1 week in airtight container

Protein per serving (25g): 3 grams

Raw Tofu Cubes (Protein Snack) (3 servings)

Simple but effective! I actually started enjoying these plain, but you can season them however you like.

Ingredients

  • 270g extra-firm tofu, cubed
  • Optional seasonings: soy sauce, lime juice, spices of choice

Instructions

  1. Cut tofu into 1-inch cubes
  2. Add your favorite seasonings if desired
  3. Let marinate 10 minutes if you added seasonings
Storage: Best eaten fresh, can be stored 2 days

Protein per serving (90g): 9 grams


Grains & Bases

Brown Rice Base

The foundation of so many great meals.

Instructions

  1. Rinse rice until water runs clear
  2. Cook in 1:2 ratio with water
  3. Bring to boil, reduce heat, simmer covered 45 minutes
  4. Let stand 10 minutes, fluff with fork

Protein per 1/3 cup cooked (85g): 2 grams

Quinoa Base

Higher protein alternative to rice.

Instructions

  1. Rinse quinoa until water runs clear
  2. Cook in 1:2 ratio with water
  3. Bring to boil, reduce heat, simmer covered 15 minutes
  4. Let stand 5 minutes, fluff with fork

Protein per 1/4 cup cooked (65g): 3 grams


Leftover Integration
Week 3 Bonus: I had some delicious leftover sweet potato and channa salad from Week 2 that was still fresh and tasty! Rather than let it go to waste, I incorporated it into this week’s meal plan. It paired beautifully with the new rajma dishes and added variety to my lunches.

Sweet Potato & Channa Salad (From Week 2)

This leftover gem from Week 2 was still perfect! The flavors had actually improved after a few days. I used it as a light lunch option and it paired wonderfully with my new rajma masala.

Storage note: This salad keeps well for 4-5 days refrigerated

Protein per serving: 8 grams

Recipe Notes & Week 3 Learnings

Spice Levels: I love spicy food, so adjust the green chilies in the dal recipe to match your heat preference!
Meal Prep Efficiency: Making large batches of rajma and dal at the beginning of the week saved so much time on busy days.
Leftover Magic:That Week 2 sweet potato salad came in handy for this week, as I have a few boxes in the freezer.
Texture Variety: Mixing crunchy makhana with soft sprouts in the chaat creates the perfect satisfying snack.
Instant Pot Win: Using the Instant Pot for brown rice made meal prep so much easier and more consistent.

Which recipe are you most excited to try? The rajma masala is definitely worth the effort – let me know how yours turns out!

Week 2 Recipes

Week 2 Recipes

Here are all the recipes I used for my second week of meal prep, with exact measurements and protein content. After learning from Week 1, I focused on creating more variety while maintaining my protein goal of about 90-100g per day and staying within my daily calorie target of about 1400-1500 calories.

My daily breakdown goal was:
– Breakfast: 300-350 calories, 15-20g protein
– Lunch: 400-450 calories, 25-30g protein
– Dinner: 350-400 calories, 20-25g protein
– Snacks: 300-350 calories, 20-25g protein

Week 2 introduced more Indian flavors and plant-based proteins, giving me the comfort foods I was craving while still hitting all my nutritional targets.


Breakfast Recipes

Morning Coffee Base (1 serving)

The perfect way to start every morning – simple and energizing.

Ingredients

  • 1 cup (240ml) unsweetened original almond milk
  • Hot coffee as desired

Instructions

  1. Heat almond milk gently (don’t boil)
  2. Pour into your coffee
  3. Enjoy while planning your successful day ahead!
Storage: Keep almond milk refrigerated, use within 7-10 days of opening

Protein per serving: 1 gram

Simple Boiled Eggs with Steamed Vegetables (1 serving)

My go-to protein-packed breakfast that keeps me satisfied for hours.

Ingredients

  • 2 large eggs, hard-boiled
  • 125g mixed steamed vegetables (broccoli, carrots, green beans)
  • Pinch of salt, pepper, lemon juice

Instructions

  1. Boil eggs for 8-10 minutes, cool and peel
  2. Steam vegetables until tender-crisp (4-5 minutes)
  3. Season vegetables with salt, pepper, lemon juice
  4. Serve eggs whole or sliced with vegetables
Meal prep tip: Boil a dozen eggs on Sunday for the week

Protein per serving: 13.5 grams

Hot Oatmeal with Flax and Berries (1 serving)

Creamy, satisfying, and packed with fiber and omega-3s. This became my weekend comfort breakfast.

Ingredients

  • 40g rolled oats (dry weight)
  • 200ml unsweetened almond milk
  • 10g ground flaxseed (1 tablespoon)
  • 60g mixed berries
  • 2g cinnamon (1/2 teaspoon)

Instructions

  1. Bring almond milk to gentle boil in small pot
  2. Add oats, stir well, cook 3-4 minutes on medium heat
  3. Stir in flaxseed and cinnamon during last minute
  4. Remove from heat, let sit 1 minute to thicken
  5. Top with berries
Pro tip: Add berries at the end to keep them from getting mushy

Protein per serving: 8.5 grams


Lunch Recipes

Zucchini Moong Dal (4 servings)

This became my absolute favorite! The zucchini adds such a nice texture and the moong dal is incredibly satisfying.

Ingredients

  • 200g yellow moong dal, soaked overnight
  • 300g zucchini, diced into 1/2-inch cubes
  • 100g onion, chopped
  • 100g tomatoes, chopped
  • 600ml water
  • 15ml oil
  • 5g cumin seeds, 2g turmeric, 2g asafoetida, salt to taste
  • Fresh cilantro for garnish

Instructions

  1. Cook soaked dal with water and turmeric until soft (15-20 minutes)
  2. Heat oil, add cumin seeds, let splutter
  3. Add onions, cook until translucent
  4. Add tomatoes and spices, cook until soft
  5. Add diced zucchini, cook 5 minutes
  6. Mix with cooked dal, simmer 5 minutes
  7. Garnish with cilantro
Storage: Gets even better the next day! Freezes beautifully

Protein per serving (250ml): 12 grams

Paneer Bhurji (using Extra-Firm Tofu) (4 servings)

I was skeptical about using tofu instead of paneer, but this was surprisingly delicious! The key is getting the spices just right.

Ingredients

  • 300g extra-firm tofu, crumbled
  • 150g bell peppers, diced
  • 100g onions, diced
  • 80g tomatoes, diced
  • 2-3 green chilies, minced
  • 15ml oil
  • Spices: 2g garam masala, 2g turmeric, 2g cumin, 1g coriander powder
  • Fresh cilantro

Instructions

  1. Heat oil, add cumin seeds
  2. Sauté onions until golden
  3. Add bell peppers and green chilies, cook 3-4 minutes
  4. Add tomatoes and spices, cook until soft
  5. Add crumbled tofu, cook 5-7 minutes
  6. Garnish with cilantro
Tofu tip: Press tofu well before crumbling for better texture

Protein per serving (150g): 12 grams


Dinner Recipes

Spinach & Chickpea Soup (4 servings)

Light but satisfying, this soup became my go-to dinner when I wanted something comforting but not heavy.

Ingredients

  • 240g fresh spinach, chopped
  • 200g cooked chickpeas
  • 100g onion, chopped
  • 10g garlic, minced
  • 720ml water
  • 15ml olive oil
  • Spices: 2g cumin, 1g turmeric, salt, pepper to taste
  • 15ml lemon juice

Instructions

  1. Heat oil, sauté onions and garlic until soft
  2. Add water, cumin, turmeric, bring to boil
  3. Add spinach and chickpeas
  4. Simmer 15 minutes
  5. Add lemon juice and season
Storage: Perfect for batch cooking, keeps well for 4-5 days

Protein per serving (250ml): 8 grams

Sweet Potato & Kala Channa Salad (3 servings)

This cold salad was perfect for busy evenings! Sweet, savory, and incredibly filling.

Ingredients

  • 300g sweet potato, cubed and roasted
  • 150g cooked kala channa (black chickpeas)
  • 50g red onion, diced
  • 30g fresh cilantro, chopped
  • 15ml lime juice
  • 10ml olive oil
  • Spices: 2g cumin, 1g chili powder, salt to taste

Instructions

  1. Roast sweet potato cubes at 400°F for 25 minutes
  2. Cool completely
  3. Mix with cooked kala channa and vegetables
  4. Whisk lime juice, oil, and spices for dressing
  5. Toss with dressing, let sit 15 minutes
Make ahead tip: Tastes even better after marinating overnight

Protein per serving (200g): 8 grams


Side Dishes & Components

Steamed Vegetables Mix (4 servings)

Simple but essential – these added color and nutrients to every meal.

Ingredients

  • 300g broccoli florets
  • 150g carrots, sliced
  • 2g salt, 1g black pepper, 5ml lemon juice

Instructions

  1. Steam vegetables 4-5 minutes until tender-crisp
  2. Season while hot
Storage: Best eaten within 3-4 days for optimal texture

Protein per serving (125g): 1.5 grams

Rainbow Capsicum Salad (1 serving)

So pretty and crunchy! This added the perfect fresh element to heavier dishes.

Ingredients

  • 30g red bell pepper, diced
  • 30g yellow bell pepper, diced
  • 30g green bell pepper, diced
  • 60g cucumber, diced
  • 30g carrot, julienned
  • 30g pomegranate arils
  • 5ml olive oil, 5ml lemon juice, pinch salt

Instructions

  1. Dice all vegetables uniformly
  2. Mix dressing ingredients
  3. Toss just before eating
Fresh tip: Prep vegetables separately, assemble just before eating

Protein per serving: 2 grams

Quinoa Base (4 servings)

My protein-rich grain base that paired perfectly with everything.

Ingredients

  • 150g dry quinoa
  • 360ml water
  • Pinch of salt

Instructions

  1. Rinse quinoa until water runs clear
  2. Bring water to boil, add quinoa and salt
  3. Reduce heat, simmer covered 15 minutes
  4. Let stand 5 minutes, fluff with fork
Storage: Keeps well for a week, great for meal prep

Protein per serving (85g): 3 grams


Snack Recipes
Personal Note: Week 2 taught me that having protein-rich snacks ready was crucial for avoiding those afternoon energy crashes.

Seasoned Tofu Cubes (3 servings)

I actually started craving these! Perfect little protein bites that satisfied my savory cravings.

I personally prefer raw tofy.

Ingredients

  • 270g super-firm tofu, cubed

Instructions

  1. Cut tofu into 1-inch cubes
  2. Mix your favorite seasonings, toss with tofu (optional)
  3. Let marinate 10 minutes, if you added seasonings.
Storage: Best eaten fresh, but keeps 2-3 days refrigerated

Protein per serving (90g): 9 grams

Greek Yogurt with Flax and Berries (1 serving)

My reliable protein powerhouse that never got boring thanks to different berry combinations.

Ingredients

  • 150g plain Greek yogurt (0% fat)
  • 10g ground flaxseed
  • 60g mixed berries
  • 1g cinnamon

Instructions

  1. Mix yogurt with flaxseed and cinnamon
  2. Top with berries
Variety tip: Try different frozen berry combinations for variety

Protein per serving: 16 grams

Recipe Notes & Week 2 Learnings

Meal Prep Success: The 4-hour Sunday prep made weekdays completely stress-free!
Protein Strategy: Combining plant proteins (dal + quinoa) gave me complete amino acid profiles.
Flavor Discovery: Indian spices transformed simple ingredients into exciting meals.
Energy Levels: The combination of complex carbs and plant proteins kept me satisfied for hours.
Flexibility Win: Having components prepared separately meant I could mix and match based on cravings.

Week 2 was a game-changer! I discovered that plant-based proteins could be just as satisfying as animal proteins, and the Indian flavors made everything feel like comfort food rather than “diet food.”

The zucchini moong dal became my absolute favorite – which recipe are you most excited to try? Let me know how your Week 2 adventures go!

Week 2 Reflections: The Real Talk About Diet Setbacks

I know it’s been weeks since my last update, and I’ve been putting off writing this reflection. Honestly? I wasn’t in the right frame of mind to share this story. I needed time to process what happened and gain some perspective before I could write about it authentically.

I needed the space between my experience and the sharing.

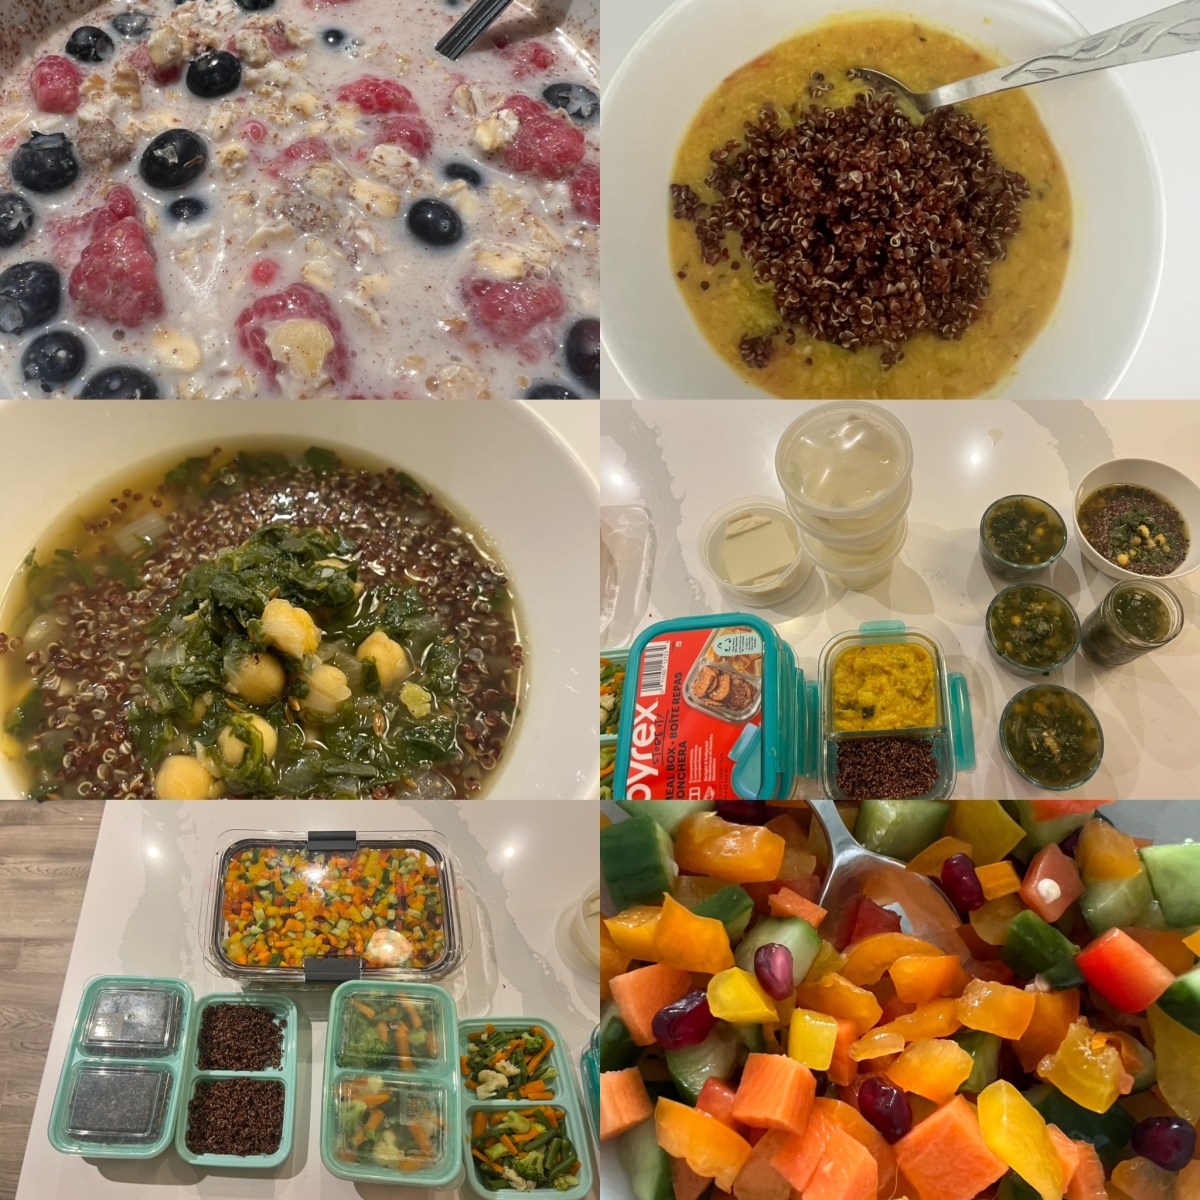
It’s Friday, 5:30 PM, and I’m staring at my meal prep containers that have been sitting untouched for two days. The week that started with such good intentions has completely derailed. Sound familiar?

I had it all planned out. Seven days of perfectly portioned meals, every calorie counted, every gram of protein calculated. But then life happened. Family commitments, unexpected plans and suddenly my beautiful meal prep felt more like a burden than a blessing.

For two whole days, I didn’t touch my planned meals. I told myself it was fine – I’d just eat within my calorie goals and focus on protein. How hard could it be?

Day one went okay. I managed to stay somewhat on track, making decent choices even without my prep.

But day two? That’s when things got interesting. I spent time with family, and we went out for a nice meal. I ate what I wanted and finished with a nice ice-cream. It felt good in the moment – freeing, even.

By day three, the scale delivered its verdict: up 3 pounds. Three. Entire. Pounds.

All that progress from the previous weeks? Gone. Just like that.

I won’t lie – I was furious. Frustrated doesn’t even begin to cover it. There was this overwhelming sense of failure, like I had let myself down in the worst possible way.

And then came the most dangerous feeling of all: rebellion. I felt angry at my diet plan. Like it was the enemy. Part of me wanted to challenge it by eating even more, just to prove some ridiculous point. Thankfully, I didn’t act on that impulse, but the feeling was real and intense.

It was during a conversation with my coach that everything clicked into place. I was ready to give up, convinced I was a failure at this whole thing.

But my coach helped me see the bigger picture. He reminded me that this journey – especially the calorie deficit phase – requires commitment and discipline. Not perfection, but consistency.

“Think of it this way,” he said. “Right now, you’re changing your body composition through exercise and nutrition. This phase requires focus because you’re literally rewiring your habits and changing your metabolism. Once you reach your goal and these habits become second nature, you’ll have the freedom to be more flexible.”

This setback taught me something valuable: the goal isn’t to never have off days. The goal is to not let off days become off weeks or off months.

Those 3 pounds? Mostly water weight from restaurant food and higher sodium. Not the end of the world.

The anger and frustration? Normal responses to feeling like I’d lost control.

The desire to rebel against my own goals? A sign that maybe I needed to build in more flexibility from the start.

I’m choosing to see this as a learning experience, not a failure. Here’s what I’m taking away:

What I learned:
– Meal prep is helpful, but I need backup plans for busy weeks
– Family time and food enjoyment matter too – I need to plan for them
– My emotions around food are still something I’m working on
– Small setbacks don’t erase previous progress

What I’m changing:
– Building in one flexible meal per week
– Having simple backup options for crazy days
– Focusing on getting back on track quickly rather than being perfect
– Remembering that this is a journey, not a sprint

Even though I’ve gotten back on track these past few days, I’ll be honest – the weight is coming off more slowly than I’d like. Maybe it’s my age, maybe it’s how my body responds, maybe it’s a hundred other factors I can’t control.

But here’s what I’ve decided: I’m going to focus on what I can control. How I fuel my body. How my body feels. Staying consistent with my exercise, whatever I can manage that day.

The scale will do what it does. My job is to show up consistently for myself, trust the process, and celebrate the wins that aren’t measured in pounds – like having more energy, sleeping better, and feeling stronger.

Week 1 Reflections

One week down, and I’m genuinely surprised by how good I feel about this whole thing. Having my meals planned and ready made everything else feel easier – I suddenly had more headspace for work, my workouts and just living my life.

I’ve been weighing myself every morning right after I wake up and use the bathroom, before eating or drinking anything. That’s when you get the most accurate reading.

I stepped on the scale yesterday morning and I’m down about 3 pounds from last week. But honestly, the number on the scale isn’t even the best part. I could see the weight dropping a little bit each day, which kept me motivated to stick with my plan.

This is what surprised me most – I feel healthier. Not just physically, but mentally too. I have more energy throughout the day, and I feel lighter in a way that goes beyond just the weight loss. The bloating I was dealing with felt better.

There’s something about knowing exactly what I’m going to eat each day that takes so much mental stress away. I’m not constantly thinking about food or worrying about whether I’m making good choices.

Everyone needs to find at least one meal that feels like a comfort food but still fits their goals. For me, that comfort spot is my masoor dal with toasted bread (I add just a tiny bit of ghee for more flavor on the bread) and a boiled egg on the side.

The egg muffins were honestly a risk I wasn’t sure about – I’ve always felt eggs do not taste good when reheated. But I’m so glad I tried them! They saved me so much time, and I love that I’m getting vegetables right in my breakfast without even thinking about it. They really do taste like masala omelettes, just more convenient.

I also discovered I really love the simple things – crunchy celery and carrots as snacks, Greek yoghurt with berries and my hot oatmeal with walnuts and berries has become something I look forward to in the morning.

These are going to be my “anchor” recipes – the ones I’ll probably include every week because they make me feel satisfied and happy.

I’m feeling positive and committed to keep this going. I spent some time this week researching new recipes for Week 2 because I want to add more variety while keeping my favorite dishes from this week.

I’m planning to do my grocery shopping today and start cooking tomorrow. I learned a lot about what to freeze and when, so I think I can do even better with keeping things fresh throughout the week.

My biggest lesson? Taking time to plan and cook for myself is about respecting my body’s needs. I used to feel mentally drained after work and would then focus on cooking for my family first – making sure they were all taken care of. By the time it was my turn, I’d just throw together something simple without thinking about calories or protein.

Even though I was eating less, I wasn’t getting enough protein – the same mistake I made in my previous weight loss attempts. But when I started putting that same planning and care into my own meals, everything shifted. Now I can cook for everyone else with an understanding of better nutrition and not having to think about what I need to make for myself saving me mental stress and helping me focus on other important things.

Find that one meal that feels like a hug – something that satisfies you and makes you feel good about eating it. Build your plan around including things you actually enjoy, not just things you think you “should” eat.

For some people, it might be a perfectly seasoned soup. For others, maybe it’s a protein smoothie that tastes like dessert. Whatever it is, make sure it’s in your regular rotation. You might discover something unexpected that becomes your favorite, like I did with these egg muffins!

I’m excited to share Week 2 with you all. The recipes, the prep, and hopefully with more good results.

What’s your comfort food that you’d want to include in a healthy meal plan? I’d love to hear what makes you feel satisfied and happy when you eat it.